How to Survive Heat Wave in RimWorld | 1.6 Heat Survival Toolkit
Local RimWorld 1.6.4633 Toolkit
Beat Deadly Heat Waves Without Losing the Freezer
This page turns your heat-wave research into a usable field kit. It is tuned to the installed build in /game, so the timings, power draw, heatstroke stages, and apparel math below all come from local RimWorld defs and source instead of generic wiki paraphrase.
Build Snapshot
The local source says a heat wave can only roll if the map's seasonal temperature is at least 20C. The incident then runs for 1.5 to 3.5 days with a 30 day minimum refire window.
Races_Humanlike.xml. Apparel heat insulation pushes the max upward from there.
Base Design & Cooling
Freezer First, Traffic Second
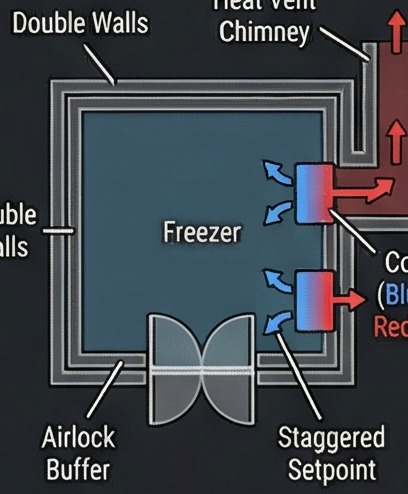
If the freezer fails, the colony spirals. The local Cooler def is airtight, costs 90 steel plus 3 components, draws 200W, and moves -21 temperature energy per second. That is enough only when the shell is tight and pawns are not constantly door-spiking the room.
- Use an airlock before you add the third cooler.
- Stagger freezer setpoints so one unit idles until noon spikes hit.
- Keep the red side vented outdoors, never into a roofed hot pocket.
Power & Solar Flare
Kill Luxury Load Before the Grid Kills You
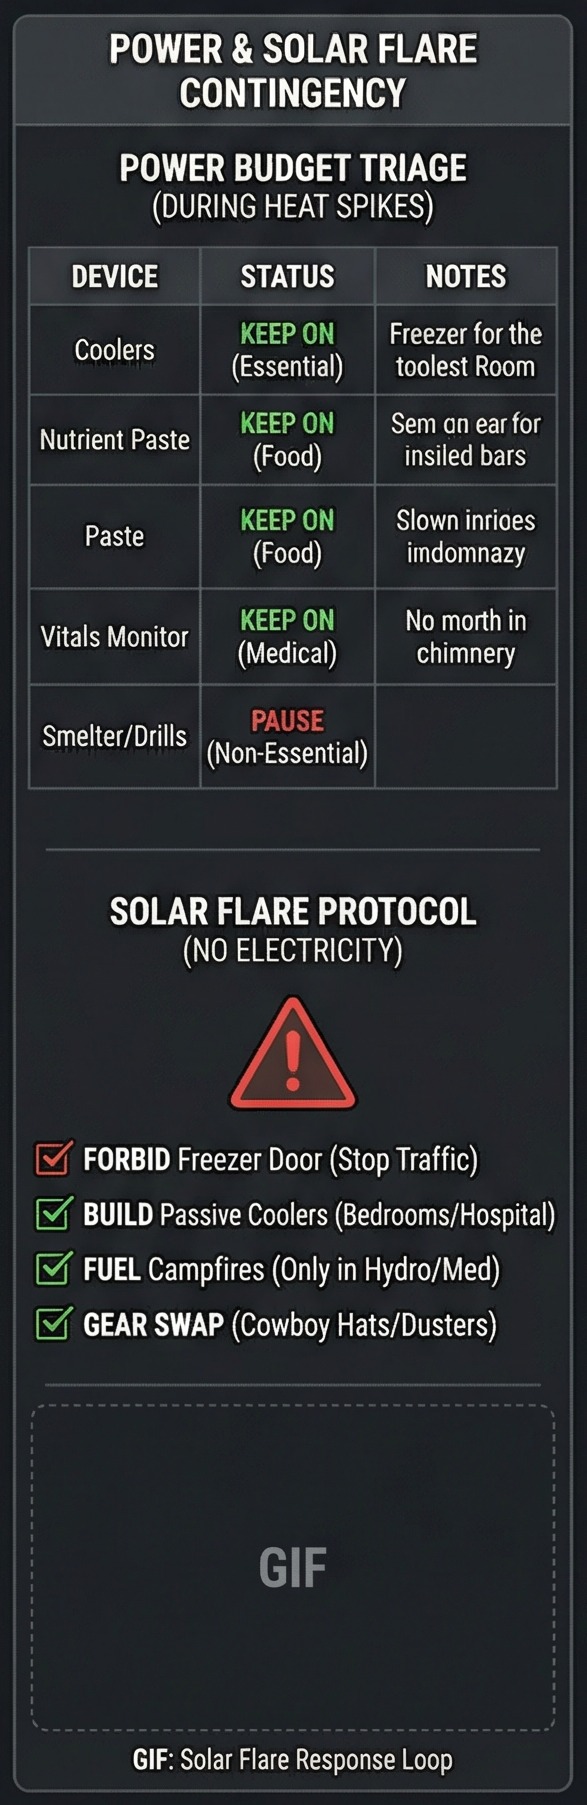
Heat waves are usually a watt problem before they are a wall problem. Your must-run list is tiny: coolers, nutrient paste if you rely on it, and hospital support. Smelters, sun lamps, and deep drills are the first sacrifices.
Apparel, Triage & Advanced
Heat Gear Beats Armor Weight
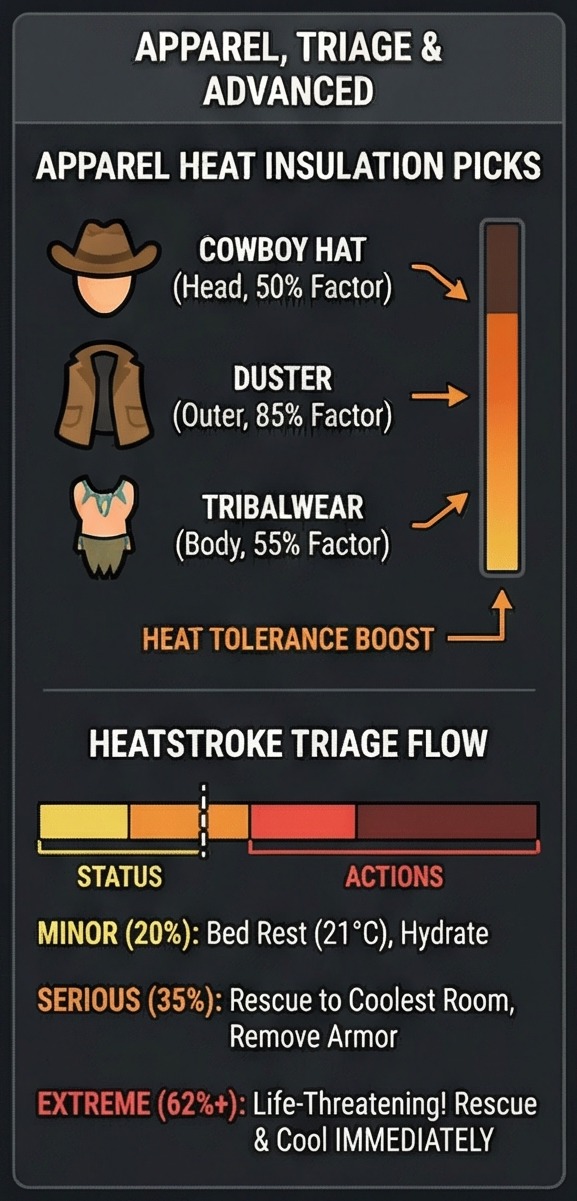
The local apparel defs back the standard advice: cowboy hats and dusters are the real heat-wave shell, while helmets and cold-weather outerwear contribute almost nothing to heat insulation.
Room Shapes & Equalization
Short Perimeter Rooms Recover Faster

Open doors trigger temperature equalization in the local door code whether the door is closed or open; open doors just do it more aggressively. That is why square rooms, short hallways, and forbidden freezer doors feel dramatically better in extreme heat.
Advanced Tactics
Midday Lockdown Wins More Than Fancy Math
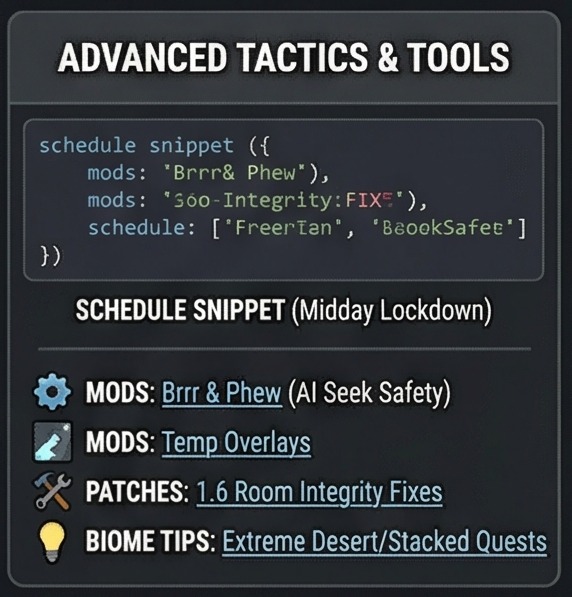
When the thermometer spikes, your best control is pathing discipline. Keep colonists inside during peak heat, reserve outdoor work for dawn and dusk, and stop animal handlers from walking the whole map for one pen refill.
Tool 1
Cooler Count Estimator
Planning math for heat waves using the local Cooler and PassiveCooler defs. This is not a full thermal sim, but it is grounded in the real 200W cooler draw, the 17C passive cooler floor, and the way traffic punishes bad layouts.
The estimator assumes the hot side of each cooler vents outdoors and the room is properly roofed. If you miss either rule, add another cooler only after you fix the layout mistake.
Readout
2 coolers, 400W draw
A 7x7 freezer at 45C usually wants two coolers if it has an airlock and the room is not a hallway.
Tool 2
Heat Outfit Planner
The local apparel system is straightforward: Insulation_Heat equals material heat insulation times the clothing multiplier, then quality scales the result. The tool below uses the same local multipliers that make cowboy hats and dusters so efficient.
The baseline human comfy max in the local Human def is 26C, not 40C. This planner starts there and adds the selected gear's heat insulation on top.
Readout
Cowboy hat + cloth duster is still the workhorse
A baseline human wearing the current kit reaches about 54C max comfortable temperature before the map goes beyond comfort into heatstroke territory.
Tool 3
Power Triage & Solar Flare Check
This section uses local building defs so the numbers line up with the installed game: geothermal is 3600W, solar is 1700W, wood and chemfuel generators are 1000W, nutrient paste is 200W, vitals monitor is 80W, hydro basins are 70W, sun lamps are 2900W, smelters are 700W, and drills are 200W.
The solar flare incident lasts 0.15 to 0.5 days locally. During that period, most electric devices are simply offline even if the fueled generators are still loaded with fuel.
Readout
Grid holds, but solar flare still drops cooling
At normal noon output, the colony has comfortable headroom. During a solar flare, the coolers, nutrient paste, and monitor still cut out, so passive coolers and route lockdown remain mandatory.
Tool 4
Heatstroke Rescue Flow
The local Heatstroke hediff becomes visible and harmful long before it turns lethal. The slider below maps directly to the installed stage thresholds so you can decide when to bedrest, when to rescue, and when to treat the pawn as a medical emergency.
Code-Backed Facts
What the Installed Build Actually Says
These are the local files used for the toolkit. If your mod list changes these defs, the vanilla numbers below stop being authoritative.
| Fact | Value | Local source |
|---|---|---|
| Heat wave eligibility | Seasonal temp must be at least 20C | Source/RimWorld/Game/Storyteller/Incidents/Workers/Map/IncidentWorker_HeatWave.cs |
| Heat wave timing | 1.5 to 3.5 days, 30 day min refire | Data/Core/Defs/Storyteller/Incidents_Map_Misc.xml |
| Solar flare timing | 0.15 to 0.5 days | Data/Core/Defs/Storyteller/Incidents_World_Conditions.xml |
| Passive cooler limits | 50 wood build, -11 heat per second, stops at 17C | Data/Core/Defs/ThingDefs_Buildings/Buildings_Temperature.xml |
| Electric cooler output | 200W draw, -21 energy per second | Data/Core/Defs/ThingDefs_Buildings/Buildings_Temperature.xml |
| Human comfort baseline | 16C to 26C | Data/Core/Defs/ThingDefs_Races/Races_Humanlike.xml |
| Heatstroke thresholds | Minor 20%, serious 35%, extreme 62% | Data/Core/Defs/HediffDefs/Hediffs_Global_Temperature.xml |
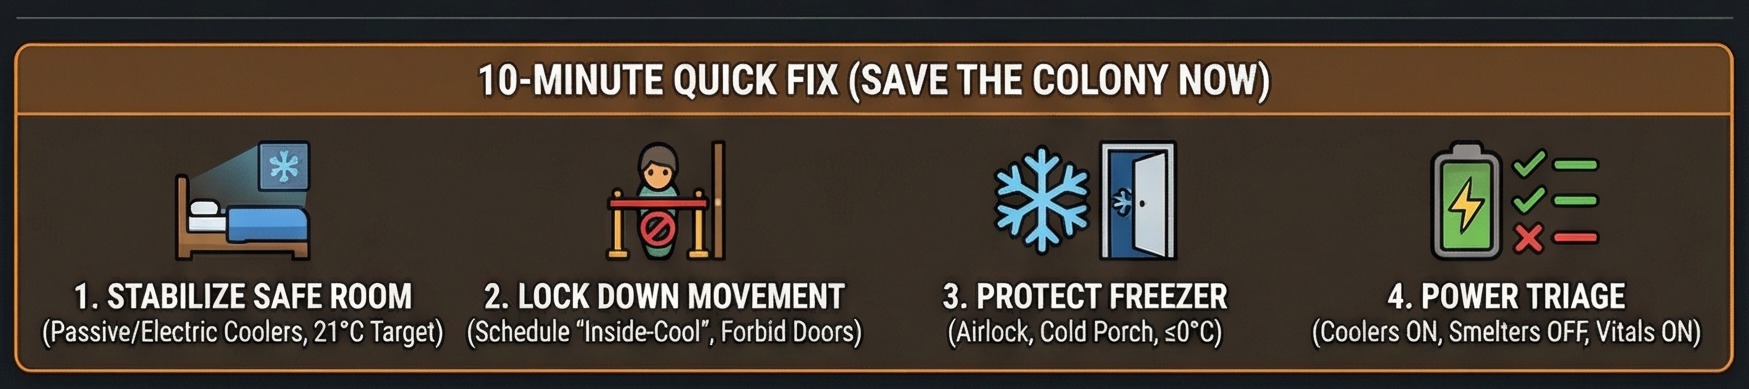
10-Minute Response
Do These in Order
This keeps the fast-play sequence stripped down to the decisions that still matter when the colony is already overheating.
-
1Stabilize one safe room. Push bedrooms or the hospital toward 21C first. If you do not have spare power, build passive coolers because they still work during solar flares.
-
2Forbid or reroute the freezer door. A constant meal line turns a good freezer into a leaky hallway. Keep the traffic out until the map temp drops.
-
3Pause luxury power load. Smelters, sun lamps, drills, and nonessential benches lose the heat-wave power budget race every time.
-
4Force heat gear and dump bad shells. Cowboy hats and dusters buy real cushion. Parkas, simple helmets, and flak helmets barely help your max comfortable temperature.
-
5Rescue serious cases before they collapse outside. The local hediff is already life-threatening at 62%, but you should be rescuing long before that.
Related Guides
Use These With the Toolkit
The site already has pages for the adjacent failure points. These are the ones that matter most during heat waves.
FAQ
Fast Answers That Matter During a Heat Wave
Short answers to the questions that usually show up when the colony is already cooking.
Do passive coolers save a freezer?
No. The installed PassiveCooler def stops cooling at 17C, which is enough for pawn rescue rooms but nowhere near freezer territory.
How many coolers for a 7x7 freezer in a 45C heat wave?
With a double wall and airlock, the planning estimate usually lands at two coolers. Heavy traffic or a single-wall shell pushes the same room toward three.
Why does this page use 26C as the human max comfort baseline?
Because the local Human def in Races_Humanlike.xml sets ComfyTemperatureMax to 26C. The generic stat definition is not the final pawn value.
What still matters during a solar flare?
Airlocks, passive coolers, campfires, deep mountain rooms, and forbidden doors. Generators can still hold fuel, but electric climate devices do not function during the flare window.